Session 1:
In the first session we had we discussed what is fashion photography and what makes fashion photography good or bad. Basically fashion photography can be literally in any form be it for advertising/commercial purposes; selling clothes, lifestyles, people. It can be set up, manipulated and posed, it can be animals, places, used to force opinion- pretty much anything; the models don't even have to be wearing or selling clothes for it to be classed as a fashion photograph. We then went onto to discus what is bad about fashion photography and we all agreed when an image has no context or layers to it; when it's simple catalog type photography- it's just boring and pointless and what makes good fashion photography is images that push boundaries, doing something completely different and new, images that have something to them; some form of meaning or aim to them. We then looked at the work from some photographers who did/do exactly that here's a list of who we looked at:
Terrance Donovan, Corrine Day, Nick Knight, Cecil Beaton, Guy Bordin, Ryan Mcginley,Juergen Teller, Hedi Slimane, Irving Penn, Tim Walker.
I then chose three out of the list and did further research on them when I got home.
Irving Penn:
An American photographer who created flat, formal black and white character portraits. He used specific lighting within the portraits to cast shadows and highlight what he wanted the viewers to see and what he wanted to conceal. He created a very edgy and abstract style to his images by studio lighting and well thought out composition; his images were way ahead of his time. Penn was one of the first photographers to use a white background/wall instead of a scene or location; meaning the focus of the image was all drawn to the model and the clothes and of course the emotion behind the image, Penn was well known for the clean and simple feel to his images, I think he achieved this feel by his presentation and instruction of/to the subject; the plain background and specific lighting(Penn used mostly studio lighting in his images but also loved natural lighting when it came to portraits). Most of Penn's character portraits where done in small, confined spaces(sometimes the subject was even wedged into these small areas) in order to bring out the subjects personally more, although unconventional it worked well and made them feel more relax; He kept the backgrounds and surroundings simple to get the most out of his subject, drawing out their personally.


Tim Walker:
A British Photographer who continuously pushes the boundaries of peoples imagination in his images. Walker, always thinking big and out of the box; not afraid to go the extra mile to create his sets/locations at any extreme; Creating a life as well as an image, bringing a story/tale to life and going about it in mind-boggling ways. His "Fashion" images are whole scenes filled with layer after layer of planning and meaning. Not just a model posing in clothes; the model is a character and the character is surrounded by a distinctly crafted and moulded background and absolutely everything is thought out. Walker changed "Fashion" photography by having the most ridiculous ideas and successfully pulling them off; he made it so that literally anything the photographer thought of when aiming to do a fashion shoot, could be made possible, Tim Walker made it so there could be so much more to a fashion image than a pretty woman in beautiful clothes posing- he created visible layers within his images that had so much detail in them, He made it so the viewer could be completely sucked into the images by the world's and fantasy's he creates. With a mix of many modern techniques, use of natural and studio lights/reflectors, creative and unique sets, a lot of different approaches and camera formats Walker creates incredible images. What makes Walker's work so unique though is less his technique and more how he designs,controls and creates his images. Tim Walker made odd and different; amazing and wonderful- he made it "fashion".


Corinne Day:
A British Photographer who completely changed the way "fashion photography" was done and seen in the early 1990's, she created a completely new style and attitude with her anti-fashion images- showing a utterly different appearance of the models in dirty squat-like location, wearing scruffy rags instead of the generic high end life that was normal perceived in fashion images. Her 'Face Of Fashion' images also kick started the modern aged "rule" that models had to be size 0 skinny. Corinne pushed boundaries because she perceived her models in an entirely different way, she wasn't afraid to do something completely different and be different, and doing so she made so many changes to the fashion industry and created/open up a whole new level and side of fashion and style that people and photographers could explore. Day never liked the fake personality and all the make-up the models put on, she always thought that they looked so much better when they were looking and acting naturally, so when she shot her images she never dressed up her model if she had the choice of course as at times she didn't but when she did she never made them do anything fake or have any make-up on; she wanted the images to be natural and the real personally of the model to come through; she thought at times that the personally showed through more than the clothes, she documented and took portraits of the models.


I jotted down some fashion projects ideas as well, as I was struggling to think of what I would do for this project, here's what I came up with:
- Studio, Plain background. Colourful subject and clothes.
- Picking and aspect of fashion and playing around with the idea, such as "run way" and doing a shoot on/in front of a plane runway or road.
- Pick an idea not related to not fashion and try interpret it in the studio or a location, such as "toy box" where the subject is dressed as different toys and the background could be a child's room.
- Extreme fashions, really going over board with stereotypes.
- Fashion + Objects as main focus such as person and car or person and animal.
- Try to interpret something non -fashion through fashion, like chocolate brands or flavours.
- Natural vs fake. 1 main shot of the model with natural face, clothes and plain background and a set of images where the model is dressed up in different ways "made into something there not"
- doing shoots where you push literal boundaries: in air, on/in water, around fire, earth/woods- elements.After doing other sessions and researching photographers I thought of another idea that I really like the sound of: I researched Irving Penn and really loved the idea and look of his photographs where the subjects are stood in a corner/tight space- I also really like the simplicity of his images. I thought of doing a shoot where the subject/s are stood in different corners/tight spaces and maybe bring in a factor of Julia Margaret-Cameron's body of work: having the subject/s expressionless or soft focused. I really like the idea so far, I will probably do test shots and see how it goes and build on it if I chose to go through with the idea.
After further thinking about the tight corners idea I realised that I knew how I wanted the images to look but I didn't know what I wanted the concept to be; I thought about having the concept been various people all stood in the same corner, dressed differently but they all are wearing a white mask in the images, I then went onto thinking about how I could have the people either wearing or holding/using something odd- something completely strange in the image, stood in this same corner. And then I thought about how I would love to do something really old fashioned clothes wise and look wise. I've decided I'll be shooting the images in black and white, I want them to be really contrasted and kind of creepy looking and I really want to use a medium format camera to do the final images with, I'll do my test images with a digital camera and my final images with the medium format camera and 120 film.
Historic Portrait Photography:
In this lesson we were working on different formats of cameras this time we used a 5 x 4 large format camera in natural lighting, I used this format camera in the studio once before but this time I got to take more images, develop them and turn it into a positive in the darkroom. We were trying to capture the images in the style of Julia Margaret-Cameron; I'd never seen her work before and I didn't know what her techniques or style were so I did struggle on that part, when I got home I did some research on her though. The first image shown below was the first negative I took in this lesson and the second images below is the next one I took. I then went on to turn the second image into a positive, but first I did a test strip; 3 seconds each time I exposed the paper to light abut 7 or 8 times but it still wasn't enough to get the image to expose properly, I decided to then try exposing the image to light for a minute and it turned out like the last image shown below. I was surprised at how much detail came out compared to the negative version of the image- the image seem more sharper and although there's too much white in the image itself I'm happy with the detail I got from it, it surprised me.
Using a 5 x 4 camera is really different to using a 35mm camera; and it has it's pros and cons compared to it. Working with 5 x 4 is defiantly a lot slower and takes more patience; the images are hardly ever going to come out "perfect" with the model having try stay still for set periods of time and hold the same pose/facical expression (if they don't it causes movement blurring in the image, and in extreme cases it can make the model look deformed due to the movement where as with a digital camera it takes a second to take an image- the model has to stay still but for barely any time depending on the continuous of the shoot or if it's a sequenced project and you can see it straight away; no developing or waiting to see what the image looks like.
What I found difficult about using a 5 x 4 was getting used to the whole technique of using it; since digital cameras are simple to take images with and using them for so long made having to fiddle around with all the extra bits(paper,film holder,flicking the shutter etc) a bit hard to get used to but when thinking about it now it's just exactly what I'd do with a digital camera; just more hands on, what I also found difficult is not being sure about how to expose the image; we had to just pure guess and hope for the best- having only two shots to get the image right is a daunting feeling, it makes the whole process more fun and hard at the same time, makes you think about what you're doing more and this is one thing I thought was good about using a 5 x 4, having to take more time to do it; if I became more confident with using them I think I'd be really happy with the whole wait and see/ slow process of it but until them using them will continue to be a tad stressful. We used paper instead of film with the large format camera and I think that the effect it had was making the final image a lot softer than it would have been on film, I like this effect because it makes the images look dreamy, unreal almost and it just adds to the whole look and feel of the final images.


Julia Margaret-Cameron:
Cameron made her images using albumen-silver prints from wet collodion glass plate negatives, Cameron was always experimenting with elements of photography and trying new things; Her earliest photos and techniques were seen as unconventional as she had an out of focus look to her images that was highly criticised as a flaw in her technique as the process she used was able to produce clear and detailed images but she simply stated "What is focus and who has the right to say what focus is the legitimate focus?" having the out of focus soft style was what made her stand out from all the other photographers at the time. The first time she used soft focus it wasn't intentional but she loved it and continued to use it despite other disagreeing with the technique being wrong. It turned out that what was producing the focus flaw was the equipment she was using; a Jamin lens which had a large aperture and a fixed stop- making it impossible to control depth of field and get sharp images at the close range she worked with her subjects in, Another factor was that the plates she used were too big for the size of the lens which made a fading off effect at the edges of her images and the exposure time of 7 minutes she used made it possible for her subjects to possibly move when it was being taken; so even more softness. It was by 1866 that she was able to get the sharp images she aimed for by fixing her equipment and plate issues. Another way Cameron experimented was with the printing of her images, she'd scratch and draw into her images; getting rid of what she didn't want in the pictures and adding to get more context and meaning. Over all her images had a soft, dreamy feel to them; the people in them looking expressionless and beautiful.


Early Portrait Photographers:
Napoleon Sarony is an early American portrait photographer who was one of the people who changed the way portraiture was done by making his subjects pose differently, had more emotion to them, some form of action(holding something), he created angles with people faces making them look different ways and added a bit more personality or narrative to his portraits. He photographed famous and rich people at the time, often they'd pay to have a portrait done but sometimes Sarony paid to photograph a portrait of certain celebrities at the time. Around that time it an average image took 15 seconds to a minute of exposure time to be fully exposed so this meant he couldn't photograph plays when they were going on, he had to photograph them before the they'd being put out to the public which meant they got an insight to the plays they were eventually going to see- Advertising and publicity for the shows.


George Washington Wilson (1825-1893), Wilson ran a successful portraiture studio by employing people to run it and take the images whilst he went out and explored landscape photography. His portrait images were more motionless and still images that are set up from the pose, content, to the expression. Wilson used the Collodion Process or rather "Collodion wet plate process" that was introduced in the 1850's where it required the photographic material to be coated, sensitized, exposed and developed within about 15 minutes meaning that a portable darkroom was needed to be used on location- Although the material can be done in humid or dry form but this meant an increase in exposure time which meant professional photographers that did portraiture couldn't use the process this way because it took too long, when the material was humid or dry it was only meant for landscape photographs where having minutes of exposer time was possible. It was the Collodion Process that almost entirely replaced the first ever photographic process(the Daguerreotype) and by the 1880's the process was replaced by gelatin dry plates; glass plates with a photographic emulsion of silver halides suspended in gelatin. The dry gelatin emulsion was more convenient and it could be made much more sensitive, which reduced exposure times by a great amount but even then the Collodion process was still used years after because of the detail it produced.

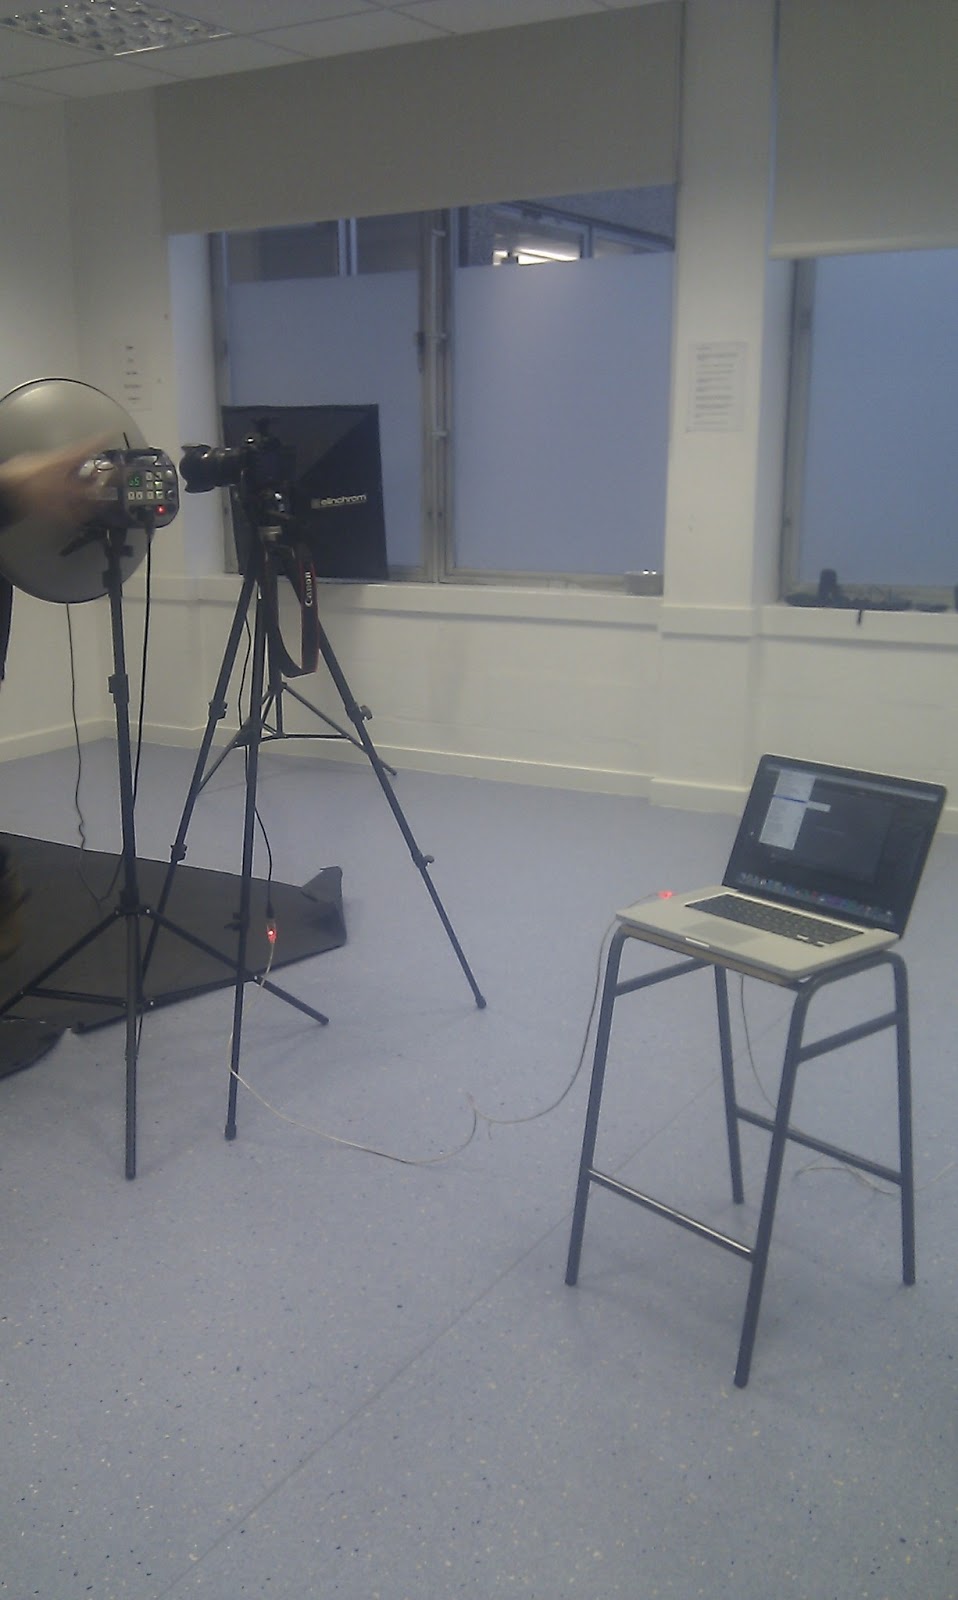
In this session we were to using a digital camera, hooked up to a laptop so that when we took the images they automatically showed up on the screen so we could see what the image looks like straight away and see what needs to be adjusted framing, lighting(etc) wise, we also used a beauty dish and a few different light filters: snoot, honey comb grid, soft box and without soft box and we had to hold up and use a white board as a reflector.
Camera and beauty dish:


Camera connected to laptop and photoshop light room, and the white-board-reflector & softbox:

snoot and honey comb grid:
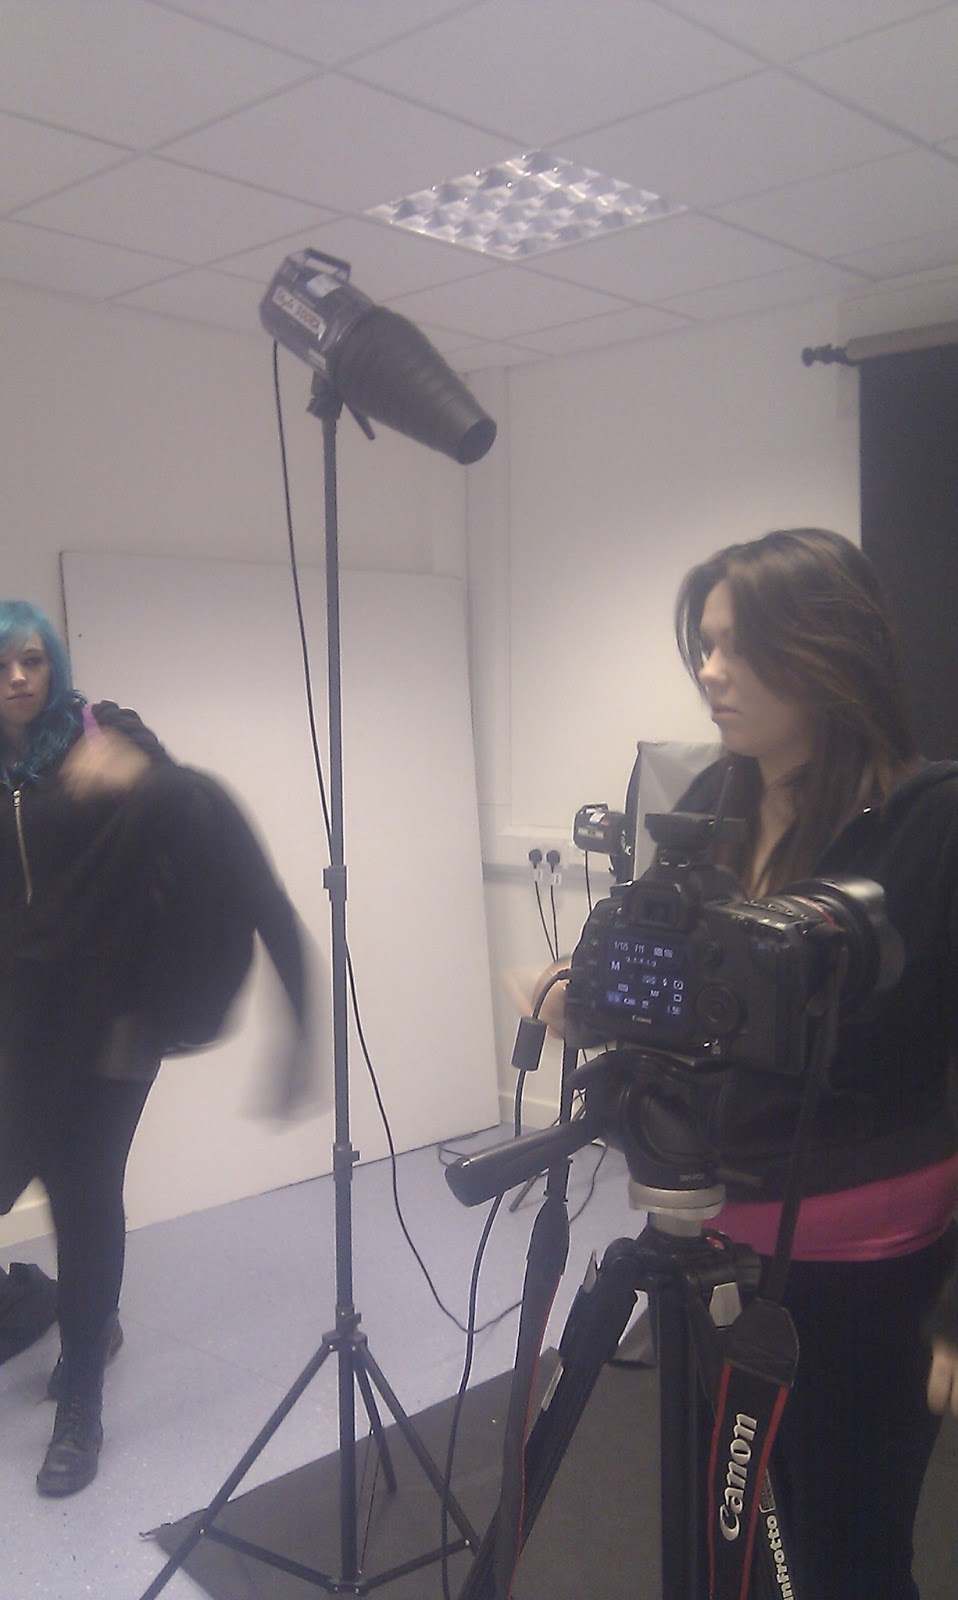

Beauty dish:

We tried to recreate the same lighting and feel to the snake image below by Rankin, it took a lot of moving the light around and changing how many lights we had and the hight in which they were at. I was adjusting and moving one light along with the teacher who was adjusting and moving the second light, The light I was controlling was lighting the models face and arm and the second light was lighting the models hand and forearm. I think the final image turned out well.

.jpg)
my first attempted edit:

In this session we learnt about 60's fashion photography and how/why the 60's was so important for fashion photography. The 60's was a huge turning point for photography and fashion photography as it was in time period that a new form of camera was produced and it opened so many more doors for photographers. The differences between the large format and the new medium format cameras are:
- The new camera is smaller, more compact. This meant photographers were able to get out of the studio and do shots on location.
- The new camera was faster shooting, meaning images took way less to take so the subject became more important, the photographer was able to talk more and communicate with the models more between shots. Over all creating a faster pace and energetic photographic environment that was more casual and chatty.
- The new camera used a roll of film instead of slides, which meant more images could be taken. This took some of the importance away when taking an image because the photographer had more then two shots to get an image right and they always had that back up if they messed up. It was also important as it meant that the photographer could try a range of poses, backgrounds etc because they had more shots to play around with.
- The process of using the new camera was a lot easier too, there was no need to load the film in complete darkness as the film came in a roll and to load the film you could do it in light. The new cameras sometimes had a mirror built into them so this meant the image that the photographer saw would be the right way round, more like the final image so it was easy to see what they'd get. The action done to take an image was easier too as an old camera you had to flick the shutter on the front of the camera and with them being so big you literally had to move to the side to do it and not even be looking at how the image looks when it's been taken whilst the new cameras had a little button you could easily get to when still looking through the finder.
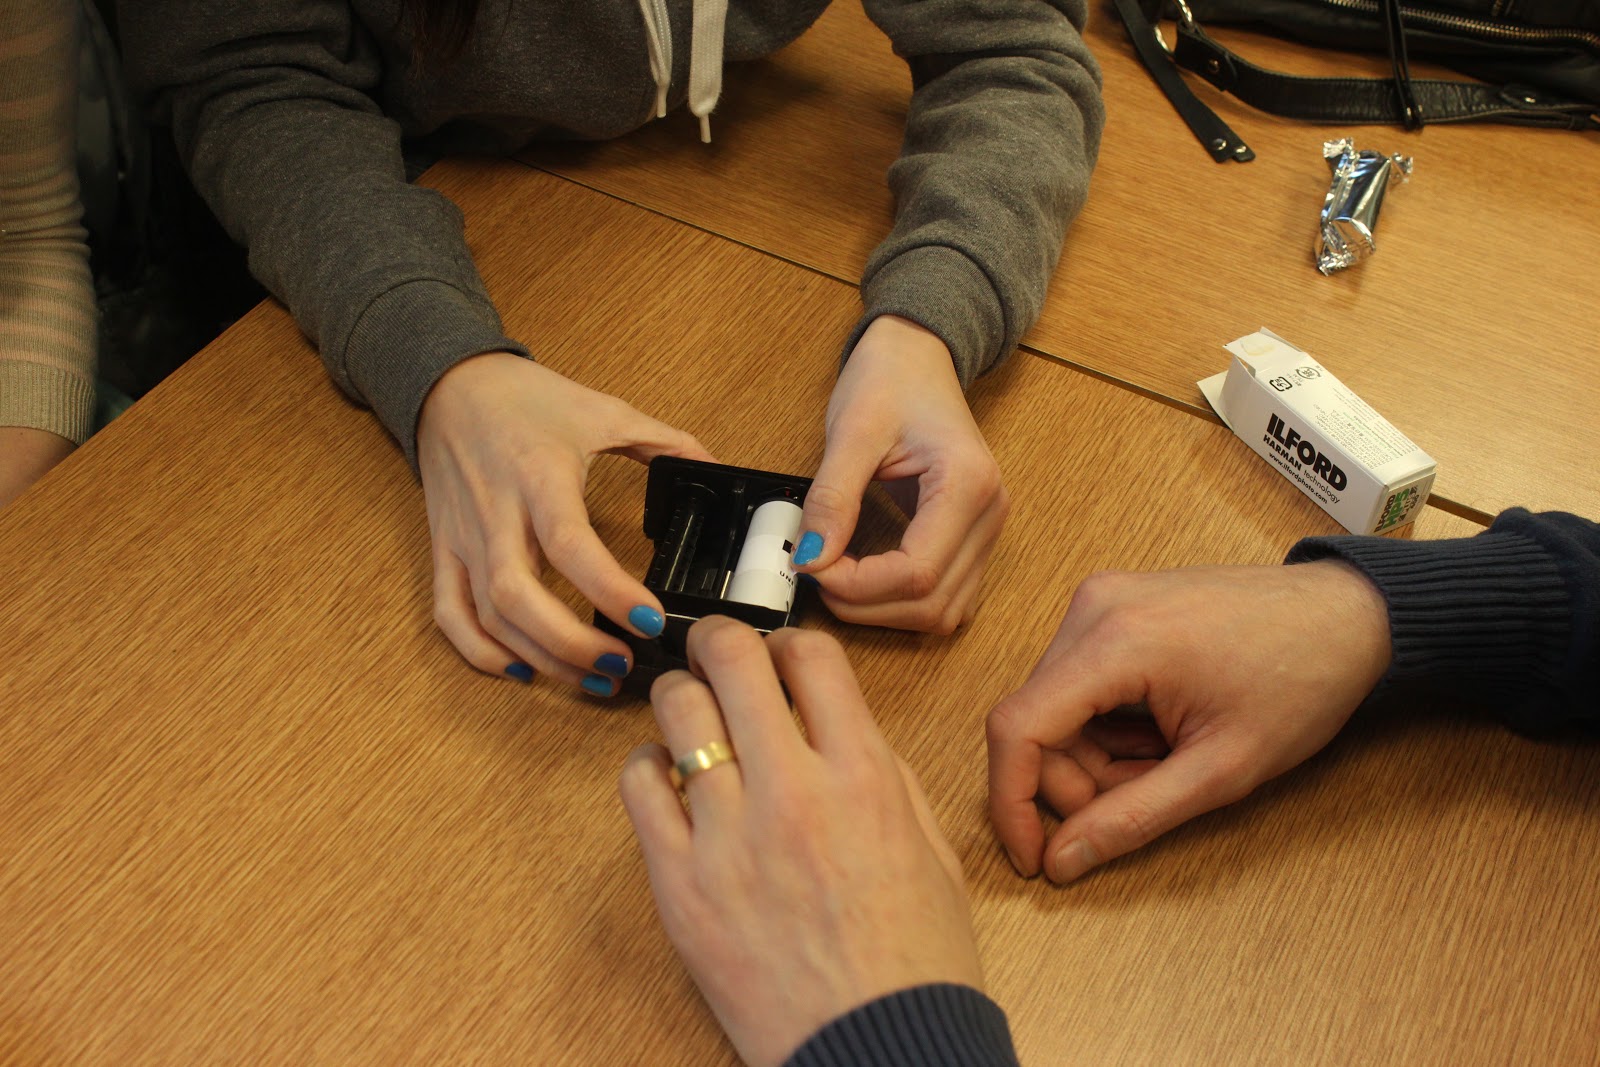
The medium format camera that we used was a Zenza Bronica.


We got taught how to load the film into the camera:


And then went outside to shot some fashion location shots:


putting the dark slide back in...

winding up for the next picture...

The we went into the studio to do some:

these next three images were to test how the lighting looked with different settings:

(1/125, F3.5)

(1/60,F3.5)

(1/60, F4.0 and this is the settings we kept)

I really loved using a medium format camera, I prefer them to digital cameras to be honest, the only thing I struggled with was twice, when I took images, I forgot to take the dark slide out of the camera the other two times I took the images without any problems. With medium format camera's I love how you get the preciousness of each shot but it's so much faster and makes it so you can communicate with the subject, I approached the shots I took just like how I would with my SLR, this is why I kept forgetting about the dark slide! I talked to and composed my subject whilst checking the focus and framing of my image then when I was about to take the image I doubled checked everything and pressed the shutter button, I didn't really find it restricting I just wished I'd of being able to take more images. The next session we had we made did test strips and a contact sheet each of the images we took this day, I only managed to do a studio session contact sheet as we ran out of time:


The image above is the one studio image I took, as when I tried to take it the first time I forgot about the dark slide, never the less I got want I aimed to get from the shot: I wanted a really natural image of the subject- I wanted a laugh or a smile that wasn't forced. I prefer portraits that are natural rather than portraits which are posed and since this was the second image I was taking I wanted to do something different than I did the first time as I picked the location, the pose/position of the model and told her to "look happy...but not that happy!" and I also directed her eyes, where as in this image all I did was choose my model got her in focus and decided when to capture it: at a moment she was laughing about something behind the lens, she composed herself completely and I think this factor makes for an overall really relaxed image.
Today we were developing large format images, unfortunately the ones we'd taken didn't come out right so we had to use this negative from someone else in our group, and it was the most awkward negative out of the lot, there was no way we could get it to be anything but flat and finding the right exposure took us far longer than we thought it would.


We took 14 test strip in total, 12 are (shown above in the order we did them) The first exposed for 4 seconds, the second for 8 and the third tiny one is exposed for 16 seconds. We then looked at these three and decided that exposing for 6 seconds would be the way to go and to add contrast to the image we added 70 magenta too it.. this create the effect shown in the forth test strip in the image above- we wasn't happy with how it turned out, we were trying to get the blacks in the image to be strong and contrasting against the rest of the lighter parts but as you can see our attempts at contrasting did not work considering the negative was an awkward one. So we tried again exposing for 7 seconds and adding 80 magenta hoping that this would make the image darker and have good contrast but it didn't work like we wanted, so again we did a test strip exposing for 7 seconds adding 20 magenta and 10 cyan- we were just trying out the effects adding colours did to see if it'd help us but of course it didn't. After exposing for 9 seconds, 14 seconds and finally to pick exposing for 12 seconds on our final image print- And adding 110 magenta, 110 yellow, 100 magenta to then finally pick 165 magenta for the final print.